Barcode Management
Barcode management in simpleBillBook allows you to generate and print barcodes for your products, making inventory management and point-of-sale operations more efficient. This guide covers how to access the barcode feature, select products, configure print settings, and generate barcode labels.
Accessing Barcode Management
To access the barcode management feature:
- Navigate to Manage Product → Barcodes from the main sidebar
- You'll be taken to the barcode management interface
Barcode Overview Page
The main barcode page displays all products available for barcode generation:
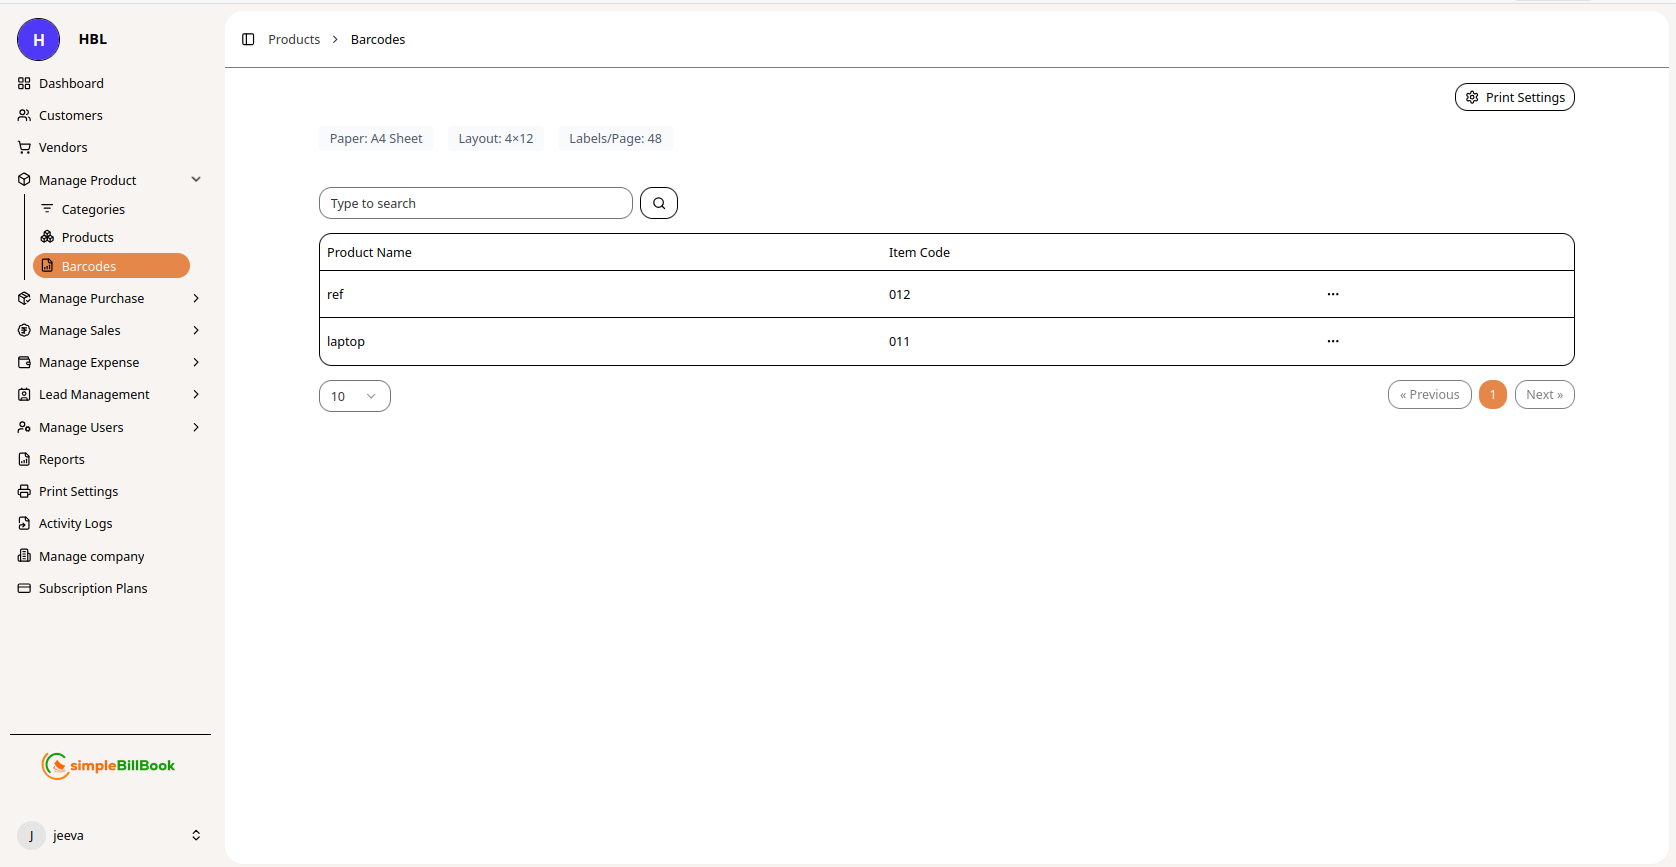 Figure 1: Barcode management page showing available products and print options
Key Sections on the Barcode Page:
Product Selection Table:
- Product Name: Lists all available products in your inventory
- Item Code: Corresponding item codes for each product
Print Configuration:
- Paper Type: A4 Sheet (default shown)
- Layout: 4×12 configuration
- Labels per Page: 48 labels maximum on A4 sheet
Navigation Controls:
- Pagination: Navigate through product pages (Previous, 1, 2, Next)
- Items per Page: Display 10 items per page (configurable)
Configuring Print Settings
Step 1: Access Print Settings
From the barcode page, access the print settings dialog (typically via a "Settings" or "Configure Print" button).
Step 2: Configure Paper and Layout
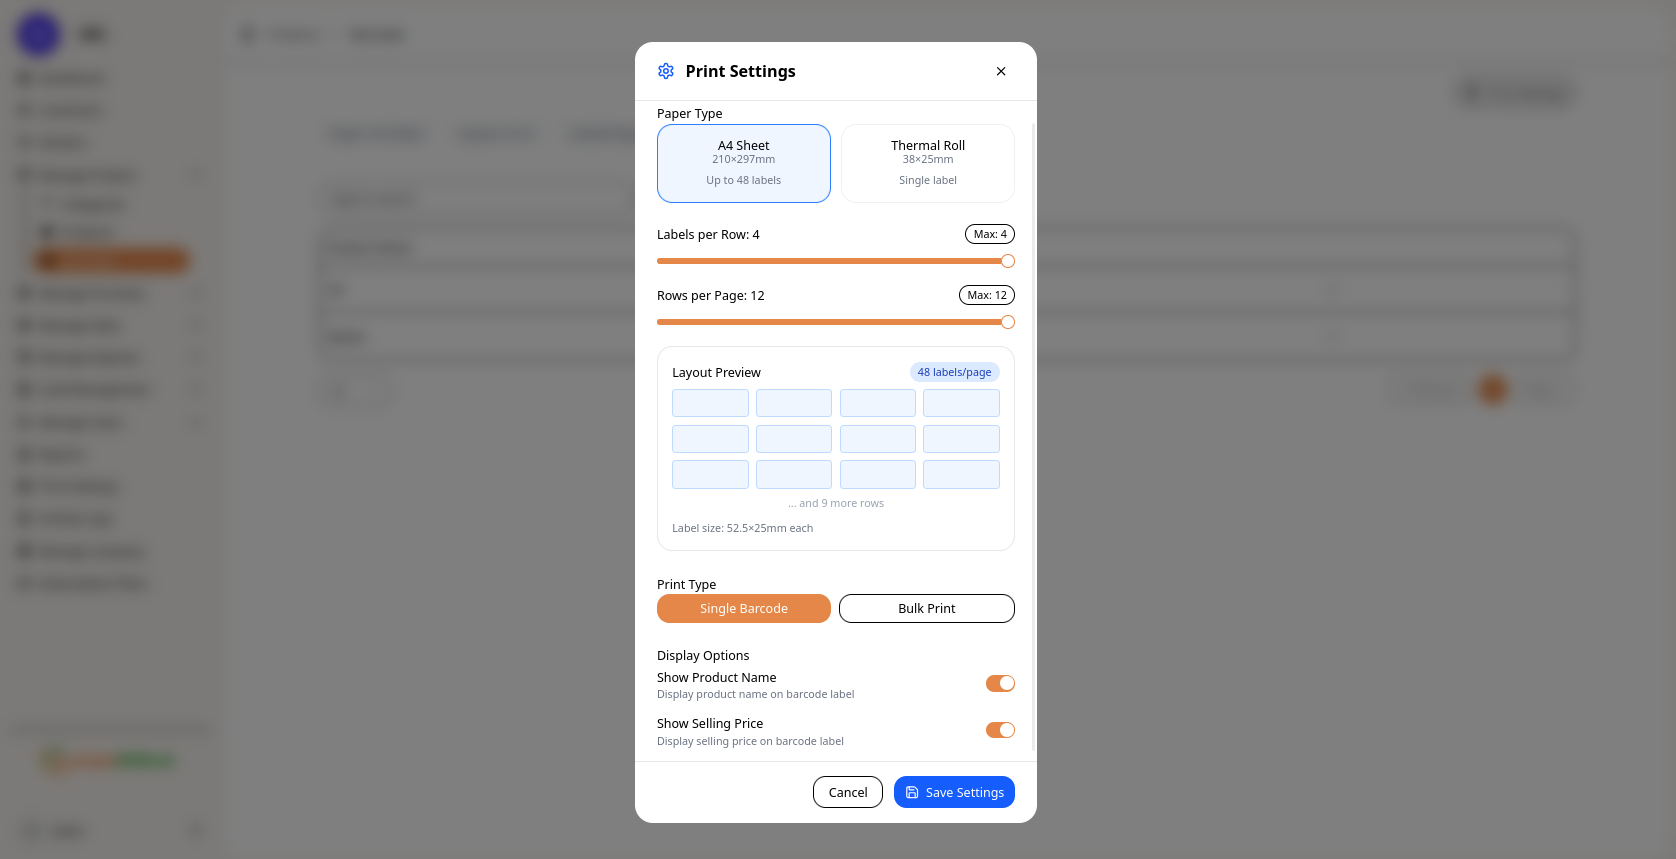 Figure 2: Print settings dialog for configuring barcode labels
Paper Type Options:
-
A4 Sheet
- Dimensions: 210×297mm
- Capacity: Up to 48 labels per sheet
- Best for: Standard office printing
-
Thermal Roll
- Dimensions: 38×25mm
- Capacity: Single label
- Best for: Thermal receipt printers (POS systems)
Layout Configuration:
- Labels per Row: Maximum 4 labels horizontally
- Rows per Page: Maximum 12 rows vertically
- Total Labels: 48 labels per A4 sheet (4×12 layout)
- Label Size: Each label measures 52.5×25mm
Print Type Options:
- Single Barcode: Print barcode for one selected product
- Bulk Print: Print barcodes for multiple selected products
Step 3: Save Settings
After configuring all settings, click Save Settings to apply. Use Cancel to discard changes.
Generating Barcodes: Step-by-Step Guide
Step 1: Select Products
- From the barcode management page, review the product list
- Select products for barcode generation by:
- Open the Barcode section on the main sidebar.
- Click the three dots (...) action menu beside the product.
- Choose Preview to view the barcode before printing.
Step 2: Configure Print Settings
-
Click the print settings button
-
Choose appropriate paper type based on your printer
-
Configure layout according to label requirements
-
Select print type (Single or Bulk)
-
A toggle option is available to display the Product Name and Product Price on the barcode label.
- Enable the toggle to show the product name and price along with the barcode.
- Disable the toggle to print only the barcode without additional product details.
Step 3: Generate and Print
- Click Print button
- Review the print preview if available
- Send to printer
- Verify printed barcodes for accuracy
Barcode Types and Standards
While the interface doesn't specify barcode types, typical standards include:
Common Barcode Formats:
- Code 128: Versatile, high-density barcode for alphanumeric data
- EAN-13: Standard for retail products worldwide
- UPC-A: Common in North American retail
- QR Codes: For additional product information (if supported)
Recommended Data Encoding:
- Primary Data: Item Code (unique product identifier)
- Additional Data: May include price, batch number, or expiration date
- Human-Readable: Item code displayed below barcode for manual reference
Best Practices for Barcode Management
Label Design and Placement:
- Clear Printing: Ensure barcodes print clearly without smudging
- Adequate Quiet Zones: Maintain clear spaces before and after barcode
- Proper Size: Minimum height of 15mm for standard scanning
- Contrast: High contrast between bars and background (black on white recommended)
Product Selection Strategy:
- High-Volume Items: Prioritize frequently sold products
- New Products: Generate barcodes when adding new inventory
- Restocked Items: Update barcodes if item codes change
Print Management:
- Test Prints: Always do a test print before bulk printing
- Label Stock: Use high-quality label paper for durability
- Printer Maintenance: Clean print heads regularly for clear barcodes
- Storage: Store unused labels in cool, dry conditions
Common Use Cases
Retail Store Setup:
- Generate barcodes for all products
- Print on A4 sheets using standard office printer
- Apply labels to products or shelves
- Use for both sales and inventory management
Warehouse Management:
- Print bulk barcodes for new shipments
- Use for inventory counting and tracking
- Apply to storage bins and shelves
Point of Sale (POS) Integration:
- Ensure barcodes match POS system requirements
- Test scanning with actual POS hardware
- Update barcodes when product information changes